-
A számítógépes alkalmazás elválaszthatatlan része a JC360® webalkalmazásának, bekapcsolt állapotban automatikusan követi és méri az Ön munkavégzését, melyről elemezhető riportokat készít.
Amennyiben a regisztráció során nem töltötte le és telepítette a számítógépes alkalmazást, meg tudja tenni, ha a jobb felső sarokban a neve melletti legördülő menüből először kiválasztja a JC360® alkalmazások telepítése-t, majd elindítja a kívánt alkalmazás letöltését.
Az alkalmazást elindítani vagy leállítani az ikonra ( ) (bal egérgombbal) kettőt kattintva tudja. (A rendszer a regisztrációkor használt IP címet automatikusan irodai hálózatnak tekinti, így akkor fog irodai tartózkodást mutatni, amikor bármelyik felhasználó azon az IP címen kapcsolódik az internetre. Bármilyen egyéb IP címről való kapcsolódás esetén a rendszer irodán kívülről dolgozónak mutatja a felhasználót. Amennyiben nem a kívánt nézetet látja, akkor az adatok pontos megjelenítése érdekében javasoljuk, hogy menjen a Céges hálózatok oldalra (
 ) és szükség esetén módosítsa az irodai IP cím beállításokat!)
Az alkalmazást az Ön kényelme érdekében úgy állítottuk be, hogy az automatikusan feladatokat hozzon létre és a feladatok közti váltást is magától végezze el, így csökkentve a manuális adminisztráció szükségességét. Amennyiben az automatikus feladatlétrehozás és váltás aktív, a manuális használatot felül fogja írni az automatikus működés. Saját szabályok felvételével tovább pontosíthatja a feladatvégzés dokumentálását.
Az automatikus feladatváltást bármikor kikapcsolhatja a webalkalmazás Alapbeállítások ( ) menüpontjában vagy, ha lenyomva tartja a CTRL billentyűt és a bal egérgombbal a számítógépes alkalmazás ikonjára () kettőt kattint. Így lehetősége nyílik a manuális feladatváltásra.
-
A rendszerben a munkaidőrögzítés minden esetben feladatokra történik. Ahhoz, hogy mindez megtörténjen, vegyen fel feladatokat a Szerkesztés/Projektek, feladatok szerkesztése/Projektek, feladatok alapadatainak szerkesztése ( ) menüpontban! A regisztrációval egyidőben generáltunk Önnek 5 feladatot (Adminisztráció, E-mailek kezelése, JC360 Adminisztráció, Megbeszélés, Szünet). További projekt vagy feladat felvétele során adja meg annak időszakát, prioritását, tervezett költségét és időtartamát!
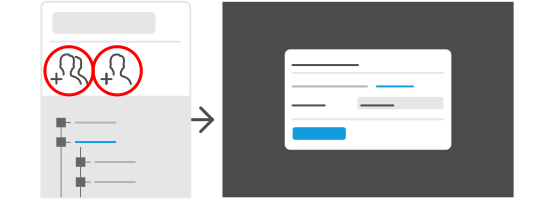
A projekt- vagy feladatfelvétellel egyidőben lehetősége van azokat kollégáihoz rendelni a felugró ablakban a "Projektrésztvevők felvétele" illetve a "Hozzárendelések" részekben.
-
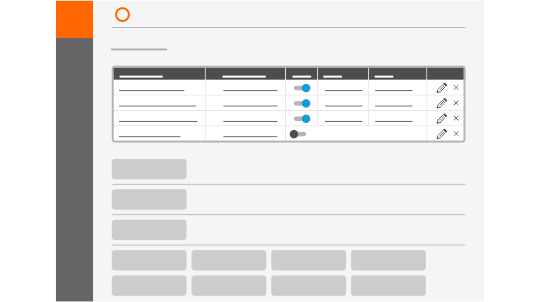
A munkaidők elkönyvelését pontosabbá teheti, ha a Kulcsszó alapú szabályok ( ) oldalon saját szabályok kialakításával automatizálja a rendszer működését. Az automatikus szabályok a megadott kulcsszavak alapján automatikus feladatváltást vagy munkastátuszból való kiléptetést eredményeznek.
A rendszer képes a beírt karaktersort az E-mail feladójában, címzettjében, tárgyában, a megnyitott alkalmazás címsorában keresni, vagy a futó alkalmazások neveiben, a megadott webcímben vizsgálni, vagy Office dokumentum nevében és/vagy elérési útvonalában figyelni.
A Feladatra váltó szabályok minden, az adott feladathoz hozzárendelt felhasználóra érvényesek. A kiléptető szabályoknál megadhatja, hogy a szabályok mely felhasználókra legyenek érvényesek.
-
Amennyiben arra kíváncsi, kollégája épp aktív-e, vagy meggyőződne arról, hogy az irodában találja, kattintson a Valós idejű aktivitás ( ) menüre! Ezen az oldalon folyamatosan frissített adatok alapján megtekintheti a felhasználók aktuális, valós idejű státuszát, munkavégzésük helyszínét (iroda, otthon, terep), egyes felhasználókat kiválasztva pedig az aznapi munkaidő statisztikáikat, a feladataik előrehaladását, mobil eszközről lejelentett munkavégzésüket, számítógépes munkaidejükhöz tartozó képernyőképeiket.
A szűrési feltételek beállításával lehetősége van azon adatok megjelenítésére, melyre szüksége van.
-
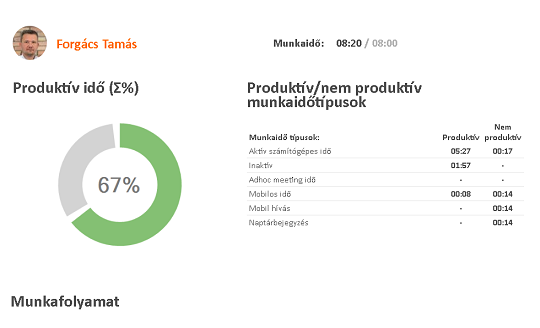
Az előzetesen produktívnak beállított feladaton, alkalmazáshasználaton, URL címen, dokumentumon vagy e-mailen végzett - számítógépes munkavégzés esetén aktív billentyűzet-, illetve egérhasználat melletti számítógépes kliens alkalmazással rögzített - munkaidő aránya az összes elkönyvelt munkaidőhöz. (Aktívnak számít a reportnál megadott paraméternél nem hosszabb inaktivitás.))
-
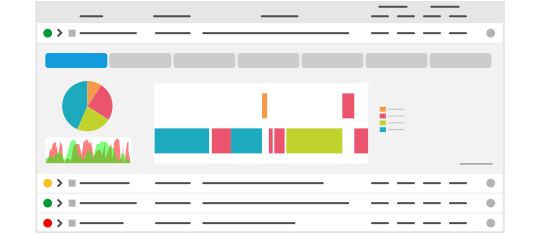
A Dashboard menüben diagramokon vagy táblázatokban, valós időben láthatja azokat a kimutatásokat, melyek Önt leginkább érdeklik.
Az oldalon található csempékről információt kaphat munkatársainak tevékenységéről, az utóbbi napokban elszámolt munkaidőkről, alkalmazás használatról és webes böngészésről. Megtekintheti továbbá munkatársai munkaidő egyenlegét, vagy produktív számítógépes munkaidejét.
Ahogy a Riportok menüből, innen is lehetősége van a kimutatások letöltésére. Az előre beállított lehetőségeken kívül saját, kedvencként elmentett riportjait is megjelenítheti ezen az oldalon.
-
A Szolgáltatás/Riportok lekérdezése/Riportok ( ) menüben számos fajtájú és információtartalmú riport lekérésére nyílik lehetősége a rendszer által gyűjtött adatokból. A riportok a következő kategóriákba redezve találhatóak komplexitásuk és tartalmuk alapján: Elemi részletező riportok, Aktivitás riportok, Aggregált üzleti riportok, Felsővezetői riportok.
Amennyiben ezek közül valamelyikre rendszeresen szüksége van, mentse el azt kedvenc riportjai közé, majd állítson be ütemezett kiküldést! Így a megadott paraméterek szerint, a beállított időpontban mindig meg fogja találni a kívánt riportot az e-mail fiókjában.
 Chrome
 Firefox
 Opera
Opera IE/Edge 10+
 Safari 6.1+